Managing your team
The Users page is where you invite teammates, control what they can access, and assign them to locations.
Roles
- User — day-to-day access limited to the locations you assign them. They don't see billing, templates, integrations or screening settings.
- Location Admin — manages their assigned locations with broader permissions.
- Admin/Owner — full access to the organization, including Settings and Billing.
Inviting a teammate
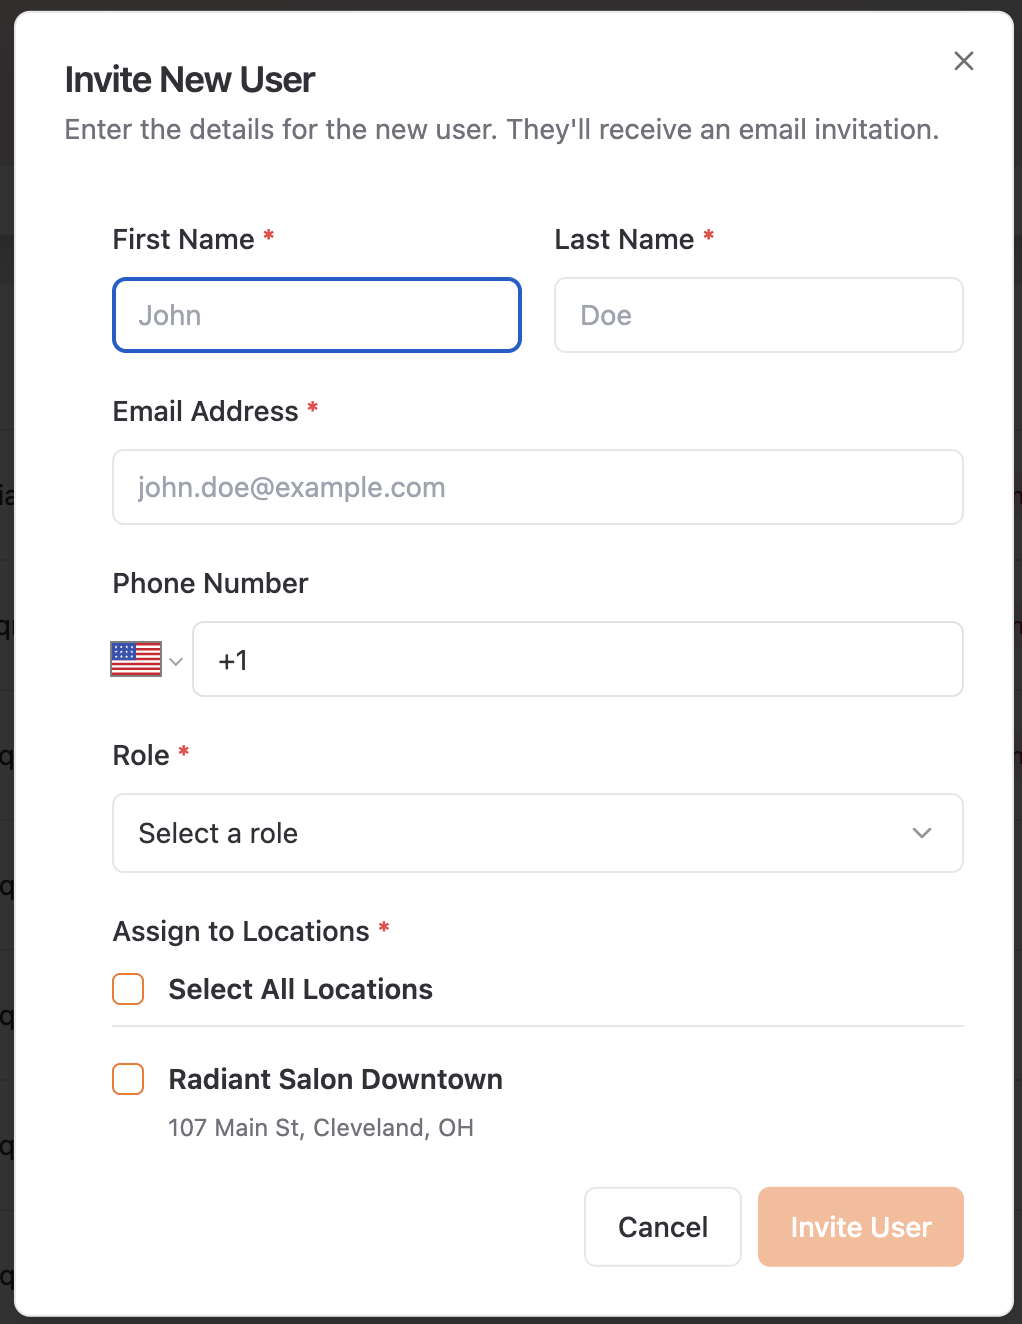
- 1. Go to the Users page and click to invite — the Invite New User dialog opens.
- 2. Fill in their First Name, Last Name, Email and Phone.
- 3. Choose their role in Select a role.
- 4. Use Assign to Locations to pick which locations they can see.
- 5. Send the invitation. They'll get an email to set their password and sign in.
Editing a teammate
- 1. Find them in the users table and open Edit User (*"Update the user details below."*).
- 2. Change their details, role or assigned locations and save.
Note: you cannot edit your own account from this page — use Settings → Profile Information for your own details.
Deactivating someone
When a teammate leaves, deactivate their account from the row actions. The table shows Created and Inactivated dates so you can see the history at a glance.
Tips
- Assign locations thoughtfully: a User-role teammate literally cannot see data from locations they aren't assigned to — dashboards, customers and reviews included.
- If a teammate says "I can't see location X", this page is the first place to check.